最新要闻
- 每日短讯:12.4万买新帕纳梅拉!近600名国内网友保时捷官网疯抢:成功下单后被取消
- 【全球时快讯】奔驰获全球首家L3级自动驾驶认证:开车不用看路 出事故奔驰负责
- 【快播报】优酷回应1元会员被扣24元争议:活动规则已告知 扣钱没毛病
- 当前热文:水墨风场景惊艳!《仙剑奇侠传7》DLC《人间如梦》官宣2月发售
- 彻底扑灭一台特斯拉Model S有多难 消防员实测:用了22.7吨水
- 【环球播资讯】小鹏股价暴跌、交付量惨淡 何小鹏专访回应:未来会这么做
- 全球动态:全球首个!婴幼儿视功能损伤手机智能筛查系统面世
- 撸猫手感 绿联iPhone 12-14系列液态硅胶保护壳9.9元起
- 天天快看点丨海淘不香了!日版Xbox主机涨价将近260元
- 天天速递!全国首烧?疑似红旗E-HS9充电时起火 现场黑烟弥漫
- 瑾娘为什么要杀华裳?瑾娘为什么假扮巽芳?
- 爱在旅途大结局是什么?爱在旅途剧情介绍
- 法国属于西欧还是北欧?南欧包括哪些国家?
- 荷兰为什么被称为水之国?荷兰水之国的资料简介
- 长宽高的英文缩写分别是什么?长宽高怎么算平方?
- 环球速讯:工信部明天起优化调整微波频率 为5G/6G预留频谱资源
手机

iphone11大小尺寸是多少?苹果iPhone11和iPhone13的区别是什么?
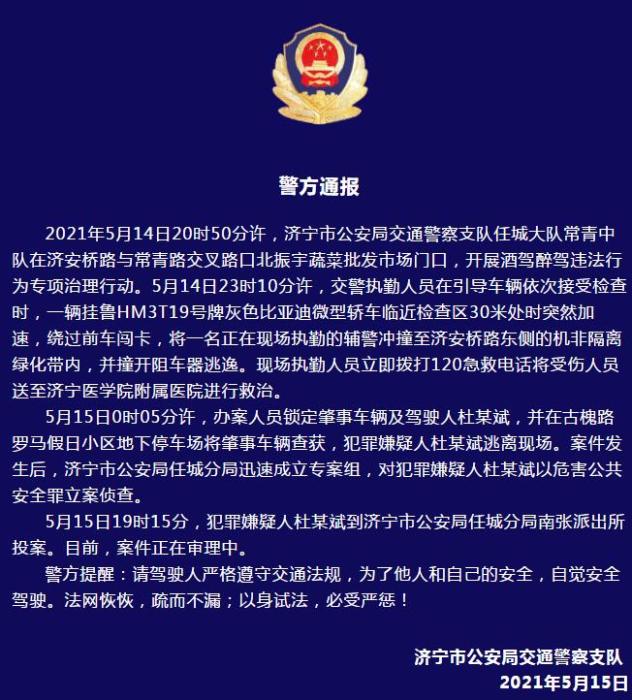
警方通报辅警执法直播中被撞飞:犯罪嫌疑人已投案
- iphone11大小尺寸是多少?苹果iPhone11和iPhone13的区别是什么?
- 警方通报辅警执法直播中被撞飞:犯罪嫌疑人已投案
- 男子被关545天申国赔:获赔18万多 驳回精神抚慰金
- 3天内26名本土感染者,辽宁确诊人数已超安徽
- 广西柳州一男子因纠纷杀害三人后自首
- 洱海坠机4名机组人员被批准为烈士 数千干部群众悼念
家电


部署Kubernetes Cluster
安装方法
kubernetes 二进制安装 (配置最繁琐,不亚于安装openstack)
kubeadm 安装 (谷歌推出的自动化安装工具,网络有要求)
minikube 安装 (仅仅用来体验k8s)
 【资料图】
【资料图】yum 安装 (最简单,版本比较低====学习推荐此种方法)
go编译安装 (最难)
基本环境说明
ip:192.168.115.149 主机名:node1ip:192.168.115.151 主机名:node2ip:192.168.115.152 主机名:node3
准备工作
说明: k8s集群涉及到的3台机器都需要进行准备
1、检查ip和uuid:确保每个节点上 MAC 地址和 product_uuid 的唯一性
2、允许 iptables 检查桥接流量:确保 br_netfilter 模块被加载、iptables 能够正确地查看桥接流量、设置路由
3、关闭系统的selinux、防火墙、Swap
4、修改主机名,添加hosts
5、安装好docker: 注意docker和k8s的版本对应关系,并设置设置cgroup驱动,这里用systemd,否则后续kubeadm init会有相关warning
#####检查ip和uuidifconfig -a/ ip acat /sys/class/dmi/id/product_uuid#####允许 iptables 检查桥接流量
1.确保 br_netfilter 模块被加载#显示已载入系统的模块lsmod | grep br_netfilter #如果未加载则加载该模块modprobe br_netfilter 2.iptables 能够正确地查看桥接流量确保在sysctl 配置中将 net.bridge.bridge-nf-call-iptables 设置为 1sysctl -a |grep net.bridge.bridge-nf-call-iptables3.设置路由cat <yum方式安装部署
(192条消息) k8s搭建部署(超详细)_Anime777的博客-CSDN博客_k8s部署
安装kubeadm,kubelet和kubectl
说明: k8s集群涉及到的3台机器都需要进行准备
#添加k8s阿里云YUM软件源vim /etc/yum.repos.d/kubernetes.repo[kubernetes]name=Kubernetesbaseurl=https://mirrors.aliyun.com/kubernetes/yum/repos/kubernetes-el7-x86_64enabled=1gpgcheck=0repo_gpgcheck=0gpgkey=https://mirrors.aliyun.com/kubernetes/yum/doc/yum-key.gpg https://mirrors.aliyun.com/kubernetes/yum/doc/rpm-package-key.gpg#安装kubeadm,kubelet和kubectl,注意和docker版本对应yum install -y kubelet-1.21.1 kubeadm-1.21.1 kubectl-1.21.1#启动,注意master节点systemctl start kubeletsystemctl enable kubeletsystemctl status kubelet集群部署
#master节点部署初始化master节点kubeadm init --apiserver-advertise-address=192.168.115.149 --image-repository registry.aliyuncs.com/google_containers --kubernetes-version v1.21.1 --service-cidr=10.140.0.0/16 --pod-network-cidr=10.240.0.0/16mkdir -p $HOME/.kube sudo cp -i /etc/kubernetes/admin.conf $HOME/.kube/config sudo chown $(id -u):$(id -g) $HOME/.kube/config
#node节点部署,根据kubeadm init执行成功生成的命令复制到node节点执行
kubeadm join 192.168.115.149:6443 --token swshsb.7yu37gx1929902tl \
--discovery-token-ca-cert-hash sha256:626728b1a039991528a031995ed6ec8069382b489c8ae1e61286f96fcd9a3bfc#node节点加入后,可在master节点进行查看节点加入情况kubectl get nodes集群部署后查看集群状态的话还不是ready的状态,所以需要安装网络插件来完成k8s的集群创建的最后一步安装网络插件
说明:master节点安装,可安装flannel插件也可安装安装calico插件,此处安装flannel插件
vim kube-flannel.yml---apiVersion: policy/v1beta1kind: PodSecurityPolicymetadata: name: psp.flannel.unprivileged annotations: seccomp.security.alpha.kubernetes.io/allowedProfileNames: docker/default seccomp.security.alpha.kubernetes.io/defaultProfileName: docker/default apparmor.security.beta.kubernetes.io/allowedProfileNames: runtime/default apparmor.security.beta.kubernetes.io/defaultProfileName: runtime/defaultspec: privileged: false volumes: - configMap - secret - emptyDir - hostPath allowedHostPaths: - pathPrefix: "/etc/cni/net.d" - pathPrefix: "/etc/kube-flannel" - pathPrefix: "/run/flannel" readOnlyRootFilesystem: false runAsUser: rule: RunAsAny supplementalGroups: rule: RunAsAny fsGroup: rule: RunAsAny allowPrivilegeEscalation: false defaultAllowPrivilegeEscalation: false allowedCapabilities: ["NET_ADMIN", "NET_RAW"] defaultAddCapabilities: [] requiredDropCapabilities: [] hostPID: false hostIPC: false hostNetwork: true hostPorts: - min: 0 max: 65535 seLinux: rule: "RunAsAny"---kind: ClusterRoleapiVersion: rbac.authorization.k8s.io/v1metadata: name: flannelrules:- apiGroups: ["extensions"] resources: ["podsecuritypolicies"] verbs: ["use"] resourceNames: ["psp.flannel.unprivileged"]- apiGroups: - "" resources: - pods verbs: - get- apiGroups: - "" resources: - nodes verbs: - list - watch- apiGroups: - "" resources: - nodes/status verbs: - patch---kind: ClusterRoleBindingapiVersion: rbac.authorization.k8s.io/v1metadata: name: flannelroleRef: apiGroup: rbac.authorization.k8s.io kind: ClusterRole name: flannelsubjects:- kind: ServiceAccount name: flannel namespace: kube-system---apiVersion: v1kind: ServiceAccountmetadata: name: flannel namespace: kube-system---kind: ConfigMapapiVersion: v1metadata: name: kube-flannel-cfg namespace: kube-system labels: tier: node app: flanneldata: cni-conf.json: | { "name": "cbr0", "cniVersion": "0.3.1", "plugins": [ { "type": "flannel", "delegate": { "hairpinMode": true, "isDefaultGateway": true } }, { "type": "portmap", "capabilities": { "portMappings": true } } ] } net-conf.json: | { "Network": "10.244.0.0/16", "Backend": { "Type": "vxlan" } }---apiVersion: apps/v1kind: DaemonSetmetadata: name: kube-flannel-ds namespace: kube-system labels: tier: node app: flannelspec: selector: matchLabels: app: flannel template: metadata: labels: tier: node app: flannel spec: affinity: nodeAffinity: requiredDuringSchedulingIgnoredDuringExecution: nodeSelectorTerms: - matchExpressions: - key: kubernetes.io/os operator: In values: - linux hostNetwork: true priorityClassName: system-node-critical tolerations: - operator: Exists effect: NoSchedule serviceAccountName: flannel initContainers: - name: install-cni-plugin image: rancher/mirrored-flannelcni-flannel-cni-plugin:v1.1.0 command: - cp args: - -f - /flannel - /opt/cni/bin/flannel volumeMounts: - name: cni-plugin mountPath: /opt/cni/bin - name: install-cni image: rancher/mirrored-flannelcni-flannel:v0.18.1 command: - cp args: - -f - /etc/kube-flannel/cni-conf.json - /etc/cni/net.d/10-flannel.conflist volumeMounts: - name: cni mountPath: /etc/cni/net.d - name: flannel-cfg mountPath: /etc/kube-flannel/ containers: - name: kube-flannel image: rancher/mirrored-flannelcni-flannel:v0.18.1 command: - /opt/bin/flanneld args: - --ip-masq - --kube-subnet-mgr resources: requests: cpu: "100m" memory: "50Mi" limits: cpu: "100m" memory: "50Mi" securityContext: privileged: false capabilities: add: ["NET_ADMIN", "NET_RAW"] env: - name: POD_NAME valueFrom: fieldRef: fieldPath: metadata.name - name: POD_NAMESPACE valueFrom: fieldRef: fieldPath: metadata.namespace - name: EVENT_QUEUE_DEPTH value: "5000" volumeMounts: - name: run mountPath: /run/flannel - name: flannel-cfg mountPath: /etc/kube-flannel/ - name: xtables-lock mountPath: /run/xtables.lock volumes: - name: run hostPath: path: /run/flannel - name: cni-plugin hostPath: path: /opt/cni/bin - name: cni hostPath: path: /etc/cni/net.d - name: flannel-cfg configMap: name: kube-flannel-cfg - name: xtables-lock hostPath: path: /run/xtables.lock type: FileOrCreate修改net-conf.json下面的网段为上面初始化master pod-network-cidr的网段地址sed -i "s/10.244.0.0/10.240.0.0/" kube-flannel.yml#执行kubectl apply -f kube-flannel.yml#执行查看安装的状态 kubectl get pods --all-namespaces#查看集群的状态是否为readykubectl get nodes===补充卸载flannel================1、在master节点,找到flannel路径,删除flannelkubectl delete -f kube-flannel.yml2、在node节点清理flannel网络留下的文件ifconfig cni0 downip link delete cni0ifconfig flannel.1 downip link delete flannel.1rm -rf /var/lib/cni/rm -f /etc/cni/net.d/*执行完上面的操作,重启kubelet
测试kubernetes集群
说明:创建一个pod,开放对外端口访问,这里会随机映射一个端口,不指定ns,会默认创建在default下
kubectl create deployment nginx --image=nginxkubectl expose deployment nginx --port=80 --type=NodePort问题总结
master节点启动kubelet异常
查看kubelet状态有如下报错属正常现象,正常进行master初始化即可
master初始化问题处理
执行kubeadm init --apiserver-advertise-address=192.168.115.149 --kubernetes-version v1.21.1 --service-cidr=10.140.0.0/16 --pod-network-cidr=10.240.0.0/16
报错如下:
原因分析:由于国内网络原因,
kubeadm init会卡住不动,一卡就是很长时间,然后报出这种问题,kubeadm init未设置镜像地址,就默认下载k8s.gcr.io的docker镜像,但是国内连不上https://k8s.gcr.io/v2/解决方案:kubeadm init添加镜像地址,执行kubeadm init --apiserver-advertise-address=192.168.115.149 --image-repository registry.aliyuncs.com/google_containers --kubernetes-version v1.21.1 --service-cidr=10.140.0.0/16 --pod-network-cidr=10.240.0.0/16
报错如下:
原因分析:拉取 registry.aliyuncs.com/google_containers/coredns/coredns:v1.8.0镜像失败
解决方案:可查询需要下载的镜像,手动拉取镜像修改tag
#查询需要下载的镜像 kubeadm config images list
#查询镜像 docker images
发现已经有coredns:v1.8.0镜像但是tag不一样,修改
docker tag registry.aliyuncs.com/google_containers/coredns:v1.8.0 registry.aliyuncs.com/google_containers/coredns/coredns:v1.8.0
再次执行kubeadm init --apiserver-advertise-address=192.168.115.149 --image-repository registry.aliyuncs.com/google_containers --kubernetes-version v1.21.1 --service-cidr=10.140.0.0/16 --pod-network-cidr=10.240.0.0/16
成功!!!!!
master初始化成功记录
1 [root@k8s-master ~]# kubeadm init --apiserver-advertise-address=192.168.115.149 --image-repository registry.aliyuncs.com/google_containers --kubernetes-version v1.21.1 --service-cidr=10.140.0.0/16 --pod-network-cidr=10.240.0.0/16 2 [init] Using Kubernetes version: v1.21.1 3 [preflight] Running pre-flight checks 4 [WARNING IsDockerSystemdCheck]: detected "cgroupfs" as the Docker cgroup driver. The recommended driver is "systemd". Please follow the guide at https://kubernetes.io/docs/setup/cri/ 5 [WARNING Hostname]: hostname "k8s-master" could not be reached 6 [WARNING Hostname]: hostname "k8s-master": lookup k8s-master on 192.168.115.2:53: no such host 7 [preflight] Pulling images required for setting up a Kubernetes cluster 8 [preflight] This might take a minute or two, depending on the speed of your internet connection 9 [preflight] You can also perform this action in beforehand using "kubeadm config images pull"10 [certs] Using certificateDir folder "/etc/kubernetes/pki"11 [certs] Generating "ca" certificate and key12 [certs] Generating "apiserver" certificate and key13 [certs] apiserver serving cert is signed for DNS names [k8s-master kubernetes kubernetes.default kubernetes.default.svc kubernetes.default.svc.cluster.local] and IPs [10.140.0.1 192.168.115.149]14 [certs] Generating "apiserver-kubelet-client" certificate and key15 [certs] Generating "front-proxy-ca" certificate and key16 [certs] Generating "front-proxy-client" certificate and key17 [certs] Generating "etcd/ca" certificate and key18 [certs] Generating "etcd/server" certificate and key19 [certs] etcd/server serving cert is signed for DNS names [k8s-master localhost] and IPs [192.168.115.149 127.0.0.1 ::1]20 [certs] Generating "etcd/peer" certificate and key21 [certs] etcd/peer serving cert is signed for DNS names [k8s-master localhost] and IPs [192.168.115.149 127.0.0.1 ::1]22 [certs] Generating "etcd/healthcheck-client" certificate and key23 [certs] Generating "apiserver-etcd-client" certificate and key24 [certs] Generating "sa" key and public key25 [kubeconfig] Using kubeconfig folder "/etc/kubernetes"26 [kubeconfig] Writing "admin.conf" kubeconfig file27 [kubeconfig] Writing "kubelet.conf" kubeconfig file28 [kubeconfig] Writing "controller-manager.conf" kubeconfig file29 [kubeconfig] Writing "scheduler.conf" kubeconfig file30 [kubelet-start] Writing kubelet environment file with flags to file "/var/lib/kubelet/kubeadm-flags.env"31 [kubelet-start] Writing kubelet configuration to file "/var/lib/kubelet/config.yaml"32 [kubelet-start] Starting the kubelet33 [control-plane] Using manifest folder "/etc/kubernetes/manifests"34 [control-plane] Creating static Pod manifest for "kube-apiserver"35 [control-plane] Creating static Pod manifest for "kube-controller-manager"36 [control-plane] Creating static Pod manifest for "kube-scheduler"37 [etcd] Creating static Pod manifest for local etcd in "/etc/kubernetes/manifests"38 [wait-control-plane] Waiting for the kubelet to boot up the control plane as static Pods from directory "/etc/kubernetes/manifests". This can take up to 4m0s39 [kubelet-check] Initial timeout of 40s passed.40 [apiclient] All control plane components are healthy after 64.005303 seconds41 [upload-config] Storing the configuration used in ConfigMap "kubeadm-config" in the "kube-system" Namespace42 [kubelet] Creating a ConfigMap "kubelet-config-1.21" in namespace kube-system with the configuration for the kubelets in the cluster43 [upload-certs] Skipping phase. Please see --upload-certs44 [mark-control-plane] Marking the node k8s-master as control-plane by adding the labels: [node-role.kubernetes.io/master(deprecated) node-role.kubernetes.io/control-plane node.kubernetes.io/exclude-from-external-load-balancers]45 [mark-control-plane] Marking the node k8s-master as control-plane by adding the taints [node-role.kubernetes.io/master:NoSchedule]46 [bootstrap-token] Using token: swshsb.7yu37gx1929902tl47 [bootstrap-token] Configuring bootstrap tokens, cluster-info ConfigMap, RBAC Roles48 [bootstrap-token] configured RBAC rules to allow Node Bootstrap tokens to get nodes49 [bootstrap-token] configured RBAC rules to allow Node Bootstrap tokens to post CSRs in order for nodes to get long term certificate credentials50 [bootstrap-token] configured RBAC rules to allow the csrapprover controller automatically approve CSRs from a Node Bootstrap Token51 [bootstrap-token] configured RBAC rules to allow certificate rotation for all node client certificates in the cluster52 [bootstrap-token] Creating the "cluster-info" ConfigMap in the "kube-public" namespace53 [kubelet-finalize] Updating "/etc/kubernetes/kubelet.conf" to point to a rotatable kubelet client certificate and key54 [addons] Applied essential addon: CoreDNS55 [addons] Applied essential addon: kube-proxy56 57 Your Kubernetes control-plane has initialized successfully!58 59 To start using your cluster, you need to run the following as a regular user:60 61 mkdir -p $HOME/.kube62 sudo cp -i /etc/kubernetes/admin.conf $HOME/.kube/config63 sudo chown $(id -u):$(id -g) $HOME/.kube/config64 65 Alternatively, if you are the root user, you can run:66 67 export KUBECONFIG=/etc/kubernetes/admin.conf68 69 You should now deploy a pod network to the cluster.70 Run "kubectl apply -f [podnetwork].yaml" with one of the options listed at:71 https://kubernetes.io/docs/concepts/cluster-administration/addons/72 73 Then you can join any number of worker nodes by running the following on each as root:74 75 kubeadm join 192.168.115.149:6443 --token swshsb.7yu37gx1929902tl \76 --discovery-token-ca-cert-hash sha256:626728b1a039991528a031995ed6ec8069382b489c8ae1e61286f96fcd9a3bfcView Codekernel:NMI watchdog: BUG: soft lockup - CPU#1 stuck for 22s! [ksoftirqd/1:14]
大量高负载程序,造成cpu soft lockup。 Soft lockup就是内核软死锁,这个bug没有让系统彻底死机,但是若干个进程(或者kernel thread)被锁死在了某个状态(一般在内核区域),很多情况下这个是由于内核锁的使用的问题。
https://blog.csdn.net/qq_44710568/article/details/104843432
https://blog.csdn.net/JAVA_LuZiMaKei/article/details/120140987


部署Kubernetes Cluster
每日短讯:12.4万买新帕纳梅拉!近600名国内网友保时捷官网疯抢:成功下单后被取消
【全球时快讯】奔驰获全球首家L3级自动驾驶认证:开车不用看路 出事故奔驰负责
【快播报】优酷回应1元会员被扣24元争议:活动规则已告知 扣钱没毛病
当前热文:水墨风场景惊艳!《仙剑奇侠传7》DLC《人间如梦》官宣2月发售
彻底扑灭一台特斯拉Model S有多难 消防员实测:用了22.7吨水
天天快消息!Android 软键盘丝滑切换(一)
天天看点:视频发布失败原因不好找?火山引擎数智平台这款产品能帮忙
速看:OpenYurt v1.2 新版本深度解读(一): 聚焦边云网络优化
【环球播资讯】小鹏股价暴跌、交付量惨淡 何小鹏专访回应:未来会这么做
全球动态:全球首个!婴幼儿视功能损伤手机智能筛查系统面世
撸猫手感 绿联iPhone 12-14系列液态硅胶保护壳9.9元起
天天快看点丨海淘不香了!日版Xbox主机涨价将近260元
天天速递!全国首烧?疑似红旗E-HS9充电时起火 现场黑烟弥漫
瑾娘为什么要杀华裳?瑾娘为什么假扮巽芳?
爱在旅途大结局是什么?爱在旅途剧情介绍
法国属于西欧还是北欧?南欧包括哪些国家?
荷兰为什么被称为水之国?荷兰水之国的资料简介
长宽高的英文缩写分别是什么?长宽高怎么算平方?
oppor7手机版本低怎么升级?oppo r7手机参数
复工第一天:请马上卸载这个恶心的软件!!!
全球看热讯:python-paramiko操作的封装
无法定位序数是什么意思?无法定位序数怎么解决?
打印机驱动在电脑哪里找?如何卸载打印机驱动?
无线适配器或访问点有问题是什么意思?无线适配器或访问点有问题怎么处理?
魅族手机怎么样?魅族手机锁屏密码忘了怎么解开?
环球速讯:工信部明天起优化调整微波频率 为5G/6G预留频谱资源
【独家】美国下手真狠!沃尔沃在美被罚8.7亿元 史上最大
快消息!APP竟比线下贵一倍还多 有电影院劝说观众退订淘票票
【世界快播报】提车1周 一特斯拉高速上行驶时方向盘脱落:维修还被收费
每日速读!全球最大游戏展E3辉煌不在:微软索尼任天堂“御三家”将集体缺席
波司登云原生微服务治理探索
今日热门!元宵节将至!元宵夜将出现年度最小满月
世界实时:侄子出演叔叔 MJ传记片年内开拍
【速看料】女子抱娃人肉占车位 还移走路障为自家车开路 结局引人舒适
世界讯息:西安阿房宫站将更名西安西站:原西站不够西
天天观热点:猪肉含量≥85% 一口全是肉:亚明猪肉烤肠2斤29.9元大促
焦点要闻:读Java8函数式编程笔记06_Lambda表达式编写并发程序
【全球新要闻】全网影视免费看,最新电影、电视剧免广告免VIP观看,只要你能搜到的,统统都能看,《狂飙》、《三体》追剧神器,时刻掌握最新剧集,无需安装,使用简单,
被苹果踢出供应链两年了 欧菲光仍未缓过劲:2022巨亏40多亿
精选!疯狂玩梗!强盛集团孙红雷直播被买鱼刷屏
焦点短讯!A卡很难追 游戏开发者越来越喜欢DLSS:理由离谱 弥补D加密损失
环球即时看!2023春节档爆发:复苏满座与极端的粉黑大战
每日消息!关于桌面上一万多个图标
刘慈欣:30年前拍不成《流浪地球2》 投资人不信中国有太空电梯
世界快看:老外幸福感暴降:英国近半年轻人担心收入永远不够养家
别贪速度快!SSD选什么接口更适合你?
《敢死队2》观后感
环球快报:VUEX 使用学习六 : modules
国产奋起!26557款软件力挺飞腾CPU
最新资讯:三大航空公司2022年合计预亏逾1000亿元!三大因素、东航最惨
环球观察:三亚凤凰机场出现滚滚浓烟?机场回应:暂无影响
快消息!这次过年 网吧终于活过来了!和以前完全不一样
河南矿山回应3名员工各领500万奖金:有人销售额超3亿
【环球报资讯】每个前端程序员都应该知道的10个Chrome扩展
刘慈欣:电影《流浪地球2》是原创而非小说改编 全方位超越第一部
今日聚焦!广东一男子打球6天后发现头顶卡对手2颗牙:网友神评论
焦点热议:索尼真有你的:背后给微软捅刀子
Acw 170.加成序列
精彩看点:React组件的使用
【全球独家】理想L5车型首次公布:不是SUV 价格坚守20万以上
每日热讯!最新显卡天梯榜公布:前十NVIDIA占五席!RTX 4090断层第一
全球新动态:杭州岳庙秦桧像被砸烂9次 游客仍不解气:专家称泄愤不应暴力
世界资讯:腾讯游戏春节7天吸金超4.5亿:《王者荣耀》独占一半 稳坐第一
世界信息:一加平板来了:Star Orbit金属打造 CNC一体机身
佳能2022年营收破4万亿日元 相机收入暴增 完全不惧手机蚕食
画面有点上头!男子扛铁板狂砸秦桧雕像:《满江红》带火景区热度
赚了!科学家在南极发现罕见大陨石:7.7公斤
全球消息!【Python】爬虫实战-基于代理池的高并发爬虫
焦点快看:rust写一个im聊天服务
全球看点:打破日本垄断!OLED关键材料FMM首次国产
环球今日讯!R星今日正式入驻B站!网友“花式”催更《GTA6》
全球观天下!显卡、主板返修排行:戴尔居然完美第一!AMD极度尴尬
环球简讯:神舟十五号航天员准备首次出舱!期待“感觉良好”
天天资讯:真我GT Neo5明天官宣 网友:赢麻了
每日视点!国产PCIe 4.0硬盘天花板 致态TiPro7000 1TB到手699元
《流浪地球2》热映 张朝阳称引力弹弓真实存在:美国航天器经历过
全球视点!比亚迪2022年业绩预告出炉:净利润同比暴增超450%
世界今热点:65寸电视不到2000元 LCD跌成白菜价 面板一哥京东方2022利润大跌70%
荣耀Magic5系列定档:2月27日MWC巴塞罗那见
Java中23种设计模式介绍和应用场景总结
今头条!手机测试之-adb
环球时讯:《鹅鸭杀》爆火,一文带你了解如何实现顶流社交游戏
DevOps: 自动与手动部署语义化版本(Semantic Versioning)实操
焦点信息:手上有了这些工具,明天争取6点下班了!
全球焦点!平价神器!新iPad mini 7曝光:处理器/屏幕惊喜
女子买电影票发现仅一个普通座位 其他全是C位 工作人员也无语
每日短讯:他真的很忙!雷军站公司门口给小米员工挨个发红包
最资讯丨打工人热议今天怎么才是周一:专家科普节后综合征
【全球热闻】《无名》折戟春节档:4.9亿票房只排第4、粉黑大战尴尬
springboot整合activiti实现流程审批(支持单体、微服务融合)
环球百事通!FPGA用ROM输出正弦波
深度学习基础课:卷积层的梯度检查
Dockerfile构建镜像
每日信息:SSL 证书基本概念扫盲
【全球速看料】亏电油耗不到5升 长安UNI-V iDD将于3月上市:或15万起售
要闻:《流浪地球2》有多硬核?工业机器人登上大银幕 周边产品也火了 超额数百倍
神操作 外卖小哥为闯红灯S形走位 被罚20元
当前快报:3.3万元!雷神ZERO 2023上架:搭载RTX 4090和i9-13900HX
【当前独家】女子被石头鱼刺伤整条胳膊肿胀 医生提醒:高档海鲜 鳍有剧毒