最新要闻
- 《新哥斯拉》导演新作《新奥特曼》曝光造型,一个经典设定被取消-环球新要闻
- 《王者荣耀》妲己九尾狐皮肤被吐槽:有人花了1200元才抽中_天天时讯
- 没5G 华为手机销量暴涨41%!为何这么多人买4G华为手机
- 五一旅游高峰人从众景点再现!网友:堵住我的车 堵不住我的腿|全球快资讯
- 深中通道伶仃洋大桥合龙
- 1799元起 小米电视A55/A65竞技版上架:4K 120Hz高刷屏
- 今日快讯:米哈游《崩坏:星穹铁道》上线腾讯START云游戏:三端互通、无需下载
- 全球最资讯丨杭州小伙开法拉利炸街被阿姨当场教育?反转再反转
- 著名演员李建华去世 网友痛心:陪伴整个童年|天天热讯
- 更加流畅!小米13、小米平板6升级安卓14了:新系统正测试
- 【环球速看料】海关首次截获外来物种巴尔干锯螽斯
- 微资讯!堵堵堵!五一前各地交通压力攀升:多地明确外地车轻微违章不处罚
- 汤唯二封百想影后:凭借《分手的决心》站上舞台
- 淘宝百亿补贴现iPhone 14 Pro Max全网最低价!256GB跌破8K:比官网便宜近2千
- Reddit“股吧”散户疯炒香港券商 日内涨幅一度达到1100%
- 天天热头条丨win10更改默认浏览器失败_win10更改默认浏览器
广告
手机

iphone11大小尺寸是多少?苹果iPhone11和iPhone13的区别是什么?

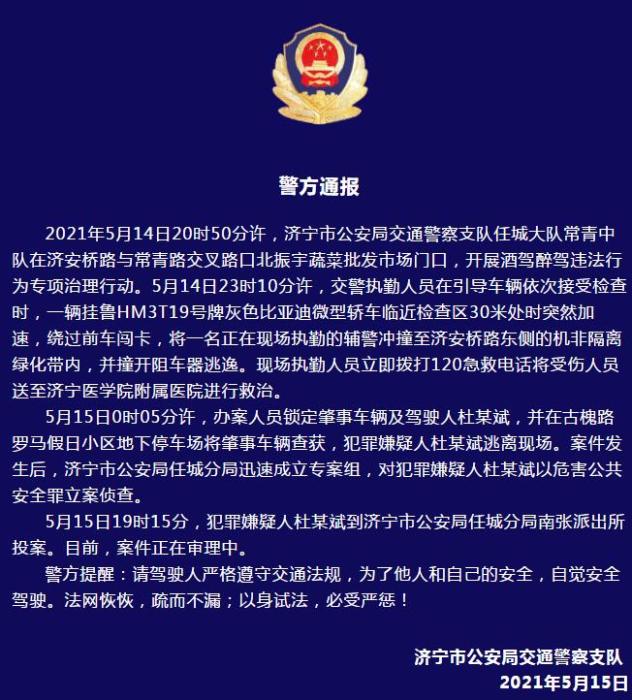
警方通报辅警执法直播中被撞飞:犯罪嫌疑人已投案
- iphone11大小尺寸是多少?苹果iPhone11和iPhone13的区别是什么?
- 警方通报辅警执法直播中被撞飞:犯罪嫌疑人已投案
- 男子被关545天申国赔:获赔18万多 驳回精神抚慰金
- 3天内26名本土感染者,辽宁确诊人数已超安徽
- 广西柳州一男子因纠纷杀害三人后自首
- 洱海坠机4名机组人员被批准为烈士 数千干部群众悼念
家电
RabbitMQ 实现消息队列延迟
 (资料图片仅供参考)
1.概述
要实现RabbitMQ的消息队列延迟功能,一般采用官方提供的 rabbitmq_delayed_message_exchange插件。但RabbitMQ版本必须是3.5.8以上才支持该插件,否则得用其死信队列功能。
2.安装RabbitMQ延迟插件
- 检查插件使用
rabbitmq-plugins list命令用于查看RabbitMQ安装的插件。
rabbitmq-plugins list检查RabbitMQ插件安装情况
- 下载插件
如果没有安装插件,则直接访问官网进行下载
https://www.rabbitmq.com/community-plugins.html- 安装插件
下载后,将其拷贝到RabbitMQ安装目录的plugins目录;并进行解压,如:
E:\software\RabbitMQ Server\rabbitmq_server-3.11.13\plugins打开cmd命令行窗口,如果系统已经配置RabbitMQ环境变量,则直接执行以下的命令进行安装;否则需要进入到RabbitMQ安装目录的sbin目录。
rabbitmq-plugins enable rabbitmq_delayed_message_exchange3.实现RabbitMQ消息队列延迟功能
- pom.xml配置信息文件中,添加相关依赖文件
4.0.0 com.olive rabbitmq-spring-demo 0.0.1-SNAPSHOT org.springframework.boot spring-boot-starter-parent 2.7.7 org.springframework.boot spring-boot-starter-amqp org.springframework.boot spring-boot-starter-web org.springframework.boot spring-boot-starter-test test org.eclipse.paho org.eclipse.paho.client.mqttv3 1.2.5 org.apache.maven.plugins maven-compiler-plugin 1.8 1.8 - application.yml配置文件中配置RabbitMQ信息
server: port: 8080spring: #给项目来个名字 application: name: rabbitmq-spring-demo #配置rabbitMq 服务器 rabbitmq: host: 127.0.0.1 port: 5672 username: admin password: admin123 #虚拟host。可以不设置,使用server默认host;不同虚拟路径下的队列是隔离的 virtual-host: /- RabbitMQ配置类
package com.olive.config;import org.springframework.amqp.core.Binding;import org.springframework.amqp.core.BindingBuilder;import org.springframework.amqp.core.CustomExchange;import org.springframework.amqp.core.Queue;import org.springframework.context.annotation.Bean;import org.springframework.context.annotation.Configuration;import java.util.HashMap;import java.util.Map;/** * RabbitMQ配置类 **/@Configurationpublic class RabbitMqConfig {public static final String DELAY_EXCHANGE_NAME = "delayed_exchange";public static final String DELAY_QUEUE_NAME = "delay_queue_name";public static final String DELAY_ROUTING_KEY = "delay_routing_key";@Beanpublic CustomExchange delayExchange() {Map args = new HashMap<>();args.put("x-delayed-type", "direct");return new CustomExchange(DELAY_EXCHANGE_NAME, "x-delayed-message", true, false, args);}@Beanpublic Queue queue() {Queue queue = new Queue(DELAY_QUEUE_NAME, true);return queue;}@Beanpublic Binding binding(Queue queue, CustomExchange delayExchange) {return BindingBuilder.bind(queue).to(delayExchange).with(DELAY_ROUTING_KEY).noargs();}} - 发送消息
实现消息发送,设置消息延迟5s。
package com.olive.service;import java.text.SimpleDateFormat;import java.util.Date;import org.springframework.amqp.AmqpException;import org.springframework.amqp.core.Message;import org.springframework.amqp.core.MessagePostProcessor;import org.springframework.amqp.rabbit.core.RabbitTemplate;import org.springframework.beans.factory.annotation.Autowired;import org.springframework.stereotype.Service;import com.olive.config.RabbitMqConfig;/** * 消息发送者 **/@Servicepublic class CustomMessageSender {@Autowiredprivate RabbitTemplate rabbitTemplate;public void sendMsg(String msg) {SimpleDateFormat sdf = new SimpleDateFormat("yyyy-MM-dd HH:mm:ss");System.out.println("消息发送时间:" + sdf.format(new Date()));rabbitTemplate.convertAndSend(RabbitMqConfig.DELAY_EXCHANGE_NAME, RabbitMqConfig.DELAY_ROUTING_KEY, msg, new MessagePostProcessor() {@Overridepublic Message postProcessMessage(Message message) throws AmqpException {// 消息延迟5秒message.getMessageProperties().setHeader("x-delay", 5000);return message;}});}}- 接收消息
package com.olive.service;import java.text.SimpleDateFormat;import java.util.Date;import org.springframework.amqp.rabbit.annotation.RabbitListener;import org.springframework.stereotype.Component;import com.olive.config.RabbitMqConfig;/** * 消息接收者 **/@Componentpublic class CustomMessageReceiver {@RabbitListener(queues = RabbitMqConfig.DELAY_QUEUE_NAME)public void receive(String msg) {SimpleDateFormat sdf = new SimpleDateFormat("yyyy-MM-dd HH:mm:ss");System.out.println(sdf.format(new Date()) + msg);System.out.println("Receiver:执行取消订单");}}- 测试验证
package com.olive.controller;import org.springframework.beans.factory.annotation.Autowired;import org.springframework.web.bind.annotation.GetMapping;import org.springframework.web.bind.annotation.RestController;import com.olive.service.CustomMessageSender;@RestControllerpublic class DelayMessageController {@Autowiredprivate CustomMessageSender customMessageSender;@GetMapping("/sendMessage")public String sendMessage() {// 发送消息customMessageSender.sendMsg("你已经支付超时,取消订单通知!");return "success";}}发送消息,访问
http://127.0.0.1:8080/sendMessage查看控制台打印的信息
关键词:
-

-

-

-

RabbitMQ 实现消息队列延迟
csv用Excel打开出现乱码
《新哥斯拉》导演新作《新奥特曼》曝光造型,一个经典设定被取消-环球新要闻
《王者荣耀》妲己九尾狐皮肤被吐槽:有人花了1200元才抽中_天天时讯
没5G 华为手机销量暴涨41%!为何这么多人买4G华为手机
五一旅游高峰人从众景点再现!网友:堵住我的车 堵不住我的腿|全球快资讯
【新华解读】“互换通”正式落地!释放外资参与境内衍生品潜力 促进金融市场稳健开放 环球时讯
深中通道伶仃洋大桥合龙
1799元起 小米电视A55/A65竞技版上架:4K 120Hz高刷屏
今日快讯:米哈游《崩坏:星穹铁道》上线腾讯START云游戏:三端互通、无需下载
全球最资讯丨杭州小伙开法拉利炸街被阿姨当场教育?反转再反转
著名演员李建华去世 网友痛心:陪伴整个童年|天天热讯
更加流畅!小米13、小米平板6升级安卓14了:新系统正测试
学系统集成项目管理工程师(中项)系列14_采购管理
【环球速看料】海关首次截获外来物种巴尔干锯螽斯
微资讯!堵堵堵!五一前各地交通压力攀升:多地明确外地车轻微违章不处罚
汤唯二封百想影后:凭借《分手的决心》站上舞台
淘宝百亿补贴现iPhone 14 Pro Max全网最低价!256GB跌破8K:比官网便宜近2千
Reddit“股吧”散户疯炒香港券商 日内涨幅一度达到1100%
【世界报资讯】Unsorted_bin_UAF
最新资讯:gin自定义中间件解决requestBody不可重复读问题
天天热头条丨win10更改默认浏览器失败_win10更改默认浏览器
天涯死了!死在越来越功利的互联网手上
锐龙6900HX仅3399元!华硕联名迷你主机发布:支持DDR5 双USB 4
8核Zen4+最强核显 AOKZOE掌机众筹:2TB版干到8000元以上
各家都在卷的Mini主机 到底是想赚谁口袋里的钱? 今日讯
世界视点!45颗北斗卫星在轨 我国境内支持北斗的智能手机超3亿部
莎琪丽/sakinre是哪个国家的品牌_什么档次怎么样
高洲原酒和李庄酒哪个好_高洲原酒-环球快消息
图解西子洁能一季报:第一季度单季净利润同比减38.88%
天祝县开展“五一”节前民生保障和假期安全生产督导检查
环球新消息丨五一长假已开启 网友对调休不满 专家称调休式放假更包容更弹性
富士X-T5等四款相机发布最新固件:提升拍摄稳定性
宋慧乔凭《黑暗荣耀》获百想视后:我得奖了妍珍呐! 环球消息
每日短讯:在rt三角形abc中角c等于90度ac等于3bc等于4 在rt三角形abc中角c等于90度
【性能】JDK和Jmeter的安装与配置|每日热门
【金融街发布】央行推重磅新规 “北向互换通” 即日起施行
热点在线丨广州成立青年创新创业税务服务工作站,减轻双创青年办税缴费负担
睡觉前千万别做这件事!伤身又伤心 你肯定“中枪”过
欧媒:金砖国家重塑全球政经秩序|世界要闻
中国进出口银行绿色信贷余额超4500亿元_世界今亮点
《圣斗士星矢》真人电影抢先看:星矢大战不死鸟一辉!特效华丽
热点聚焦:白菜价LCD且买且珍惜 面板一哥京东方Q1利润暴跌94%:价格已开始反弹
油价居高不下!中石油、石化、海油三桶油赚大:一季度轻松几百亿 当前讯息
天天快讯:探寻历史文脉 守护城市记忆
中信建投国家电投新能源REIT公告原始权益人增持 彰显新能源REIT市场长期投资价值 环球资讯
全球快看点丨佛山机器人产业链如何借势优化?数智化、资本化构建千亿级产业“新赛道”
网红日式甜品零食 上行斋生巧福团1.45元/枚发车
天天微动态丨每天烧掉4300万!无人驾驶出租车巨头摊牌:最多再撑一年
焦点观察:杭州女子遇“串串刺客”:吐槽6片菜叶6块钱
太卷了!四川烧烤虫草火了 还有牦牛刺身:网友直呼太硬核|环球热议
氯化钡和碳酸钠反应(碳酸钠与氯化钙反应的化学方程式)
紧身皮裙 透视look 30+的女人原来这么敢穿
今热点:门票、火车票一抢而空!这假期注定人潮汹涌
官方明确了!广州不鼓励发展共享电动自行车
当前视讯!61岁京东快递员退休 退休金每月3000+ 同行羡慕
10999元!海尔发布混动热水器:可燃气可纯电 3种加热模式
精神阿根廷人哭泣 《星战幸存者》游戏1.9元bug价没了
凯度电器亮相AWE:解锁高端厨房,创造美好厨居生活-环球热门
天天热推荐:OAuthApp v2.4.28 | 前端发布工具 | Azuer OpenAI、SSL 证书工具
环球通讯!开心档之MySQL 导出数据
焦点简讯:MQTT-QoS与协议流程
H7-TOOL的CANFD Trace全解析功能制作完成,历时一个月(2023-04-28) 今日看点
12 Linux的伙伴系统和SLAB分配器
吉林省一季度末绿色贷款余额同比增长28.3%|环球新动态
【新华财经调查】辽沈银行去年置换257亿高息存款 历史包袱仍致29亿亏损
每日快讯!大明国际(01090):公众持股量约为20.71% 低于上市规则规定的最低规定百分比
抗菌透气!蝶安芬四角裤3条39.9元大促
每日看点!歼20看爽!国产航空大片《长空之王》今日上映:严查偷漏瞒报票房
曾致人死亡 印度再发生火车撞牛事故:工作人员现场拆车头
被老人故意推倒摩托车主终获赔偿:强制执行划扣16704元 环球速递
淄博大哥免费接送游客被塞钱 网友:双向奔赴-每日消息
世界百事通!刚刚!美光宣布:不降价!
软件开发所有文档合集下载 全球今亮点
最新资讯:题目 3158: 蓝桥杯2023年第十四届省赛真题-三国游戏(贪心)
美团一面:如何实现一个100W ops 生产者消费者程序?
银河麒麟V10系统安装Redis|环球观点
vue3 + ts + vite 封装 request 每日热议
焦点关注:商品日报(4月28日):黑色系疲软焦煤大跌近4% 红枣收涨近4%
国家外汇管理局:1-3月,中国外汇市场累计成交60.15万亿元|天天快资讯
每日速讯:iPhone 15系列换USB-C接口了!快充感人
环球即时:出城大片上演:多地道路拥堵
天天热头条丨手机销量大增41%!华为王者归来:一季度营收1321亿 涨了
密集落下!实拍北京多地突降冰雹:黑云压城
顶流“花花”提前休五一 保安大叔:和叶在值班
火车软卧是什么样子的(火车软卧)
用 ChatGPT 写代码,效率杠杠的! 实时
一文看懂低代码,5分钟从入门到原理全搞定 环球热文
论并行,并发,同步,异步之间的联系与区别-天天实时
【环球速看料】柞水终南山寨一日游攻略(终南山寨在什么地方)
中信建投国家电投新能源REIT获原始权益人增持3200万份
天天快资讯丨【财经分析】IPv6如何从“能用”转向“好用”“爱用”?
不靠氪金 价格卷死同行:逆水寒手游开启二测多次冲上热搜:预约超3000万
好友田启文爆料周星驰或将于65岁重返大银幕!自导自演、阵容空前-短讯
抗衡奔驰E级 全新宝马5系无伪谍照首曝:大鸡腿档杆成历史
比马斯克的猎鹰还强10倍?俄罗斯自研火箭将可重复使用100次 天天热点
蔚来起诉抖音大V造谣侵权:索赔200万
环球观点:中科氢量平通仪好不好(中科氢量平通仪)
python的绘图工具matplotlib.pyplot-环球报资讯
App Store上架流程/苹果app发布流程 全球快播


